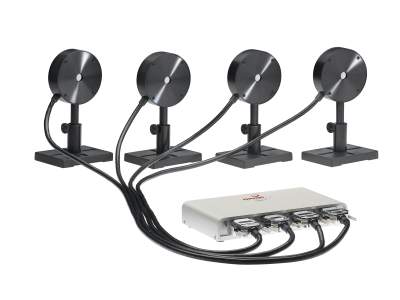
The 1-4 channel Pulsar is a virtual meter allowing connectivity of Ophir’s smart (DB-15) power and energy sensors to automation systems and computers using Ethernet connectivity. It allows remote monitoring and control of the meter via customer custom software, or the Ophir provided PC application
1,2 and 4 channel models
Plug and play with most Ophir sensors
Record every energy pulse at up to 25 kHz
Measure missing pulses & trigger output with external trigger
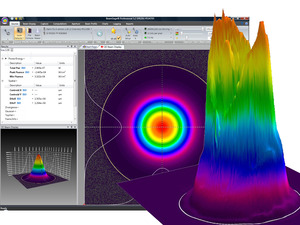
Log power and energy, average, statistics, histograms with StarLab application
System Integrator Tools included: LabVIEW VIs, COM Object Interface
Additional CAD file downloads are not available for this product.
pulsar-usb-power-meter - Drawings
Additional drawings are not available for this product.
PC Software & Drivers
This section describes various ways to interface the Ophir meter to your PC as well as the software options available. Check out the datasheet for more details.
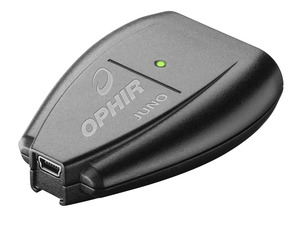
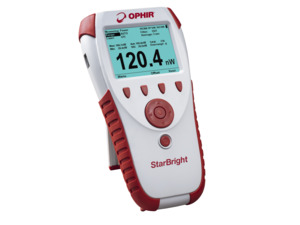
The StarLab application together with an Ophir meter turns your PC or laptop into a full-fledged laser power/energy meter. Supports most Ophir laser power/energy sensors. Up to 8 sensors can be displayed at once on one PC. By using the Ophir COM Object, you can control the device from your own application. Supports the Ariel, Centauri, StarBright, StarLite, Juno, Juno+, Nova II, Vega, Pulsar-1/2/4, Quasar, EA-1 and Ariel devices.
Library supplied for a complete measurement interface with most of our USB speaking devices (Centauri, StarBright, StarLite, Juno, Juno+, Nova-II, Pulsar, Vega). Makes use of our new COM object.
Firmware - Pulsar
Embedded Software for Pulsar Interface
On startup, StarLab loads the Pulsar interface with its firmware automatically (current firmware version: 1.30).
Specifications
Product Name
Pulsar-1/Pulsar-2/Pulsar-4
Thermal Sensor Compatibility
Yes
Photodiode Sensor Compatibility
Yes
Pyroelectric Sensor Compatibility
Yes
BeamTrack Sensor Compatibility
No
Statistics
Yes
Analog Out
No
Trigger Input/Output
Yes
Power Supply
12V Power Supply (included)
USB
Yes
Data Transfer Rate
25,000 Hz
On-Board Data Storage
No
Automation Interface
Yes
Labview VI's
Yes
CE Compliance
Yes
UKCA Compliance
Yes
China RoHS Compliance
Yes
Features
StarLab 3.0: Introduction and First Steps
This video explains the various items on the StarLab screen, and shows you how to perform basic laser measurements. Part 1 of a series of video segments teaching you how to use StarLab.
StarLab 3.0: Second Steps
Sometimes we want to not only get a reading, but perform additional processing on the reading. This video shows you how to use various functions in StarLab, such as Averaging, Scale Factor, Normalize, Density, etc. Part 2 of a series of video segments teaching you how to use StarLab.
How to Detect Missing Laser Pulses with a Pyroelectric Sensor
This video will show you how to detect and record any missing pulses in your pulsed laser beam application.
Laser Measurement PC Interfaces
If all your laser measurement work involves a laptop or a PC, rather than a stand-alone meter, one of Ophir's direct-to-PC interfaces could be an ideal solution. These are full-fledged Laser Power and Energy meters, but instead of having a separate on-board display, the PC becomes your display. In this video you will learn about the range of PC Interfaces available from Ophir.
Ophir Laser Measurement Virtual Meters
If all your laser measurement work involves a laptop or a PC, one of Ophir's direct-to-PC virtual meters could be an ideal solution. These are full-fledged Laser Power and Energy meters, and - together with the sensor and Ophir’s powerful StarLab software application - turn your PC into a full-function, multi-channel laser measurement workstation.
In this webinar, you will learn about the range of virtual meters and interface options available from Ophir.
In theory USB supports up to 127 devices. We recently had 12 sensors connected to StarLab, and it worked normally. The practical limitation is basically how many channels you can realistically see on the display (which would not be a limitation if you will only be logging the data), and of course the number of available USB ports/hubs.
All USB speaking devices (EA-1, Juno, Juno+, Pulsar and USBI as well as the StarBright, Centauri, Vega, Nova-II, and StarLite Power and Energy Meters) can be controlled via our StarLab. This provides full remote control and measurement capabilities. In addition, system integrators can make use of the OphirLMMeasurement COM object for all of our USB speaking devices that are included in the application installation. Documentation and Examples in Visual Basic, LabVIEW are found in the "Automation Examples" sub-directory of your StarLab directory.
Ophir periodically releases new versions of StarLab, adding new features and fixing bugs, so it's a good idea to keep updated with the latest StarLab version.
StarCom is our legacy PC application which connects via RS232 (not USB), for old Ophir instruments having RS232 interface capability (Vega, Nova II, LaserStar and Nova). It performs all basic functions such as real-time data logging, saving data in PC file, off-line data viewing, printing, etc. For a relatively new computer, you'd have to check that it has a serial port to which to connect the meter. The last release of StarCom was in 2008, with all that this implies. StarCom should nevertheless be able to work on a Win7 32 bit PC. More information, including software download, is available at https://www.ophiropt.com/laser-measurement-instruments/laser-power-energy-meters/software/starcom.
StarLab is our full-featured PC application that connects via USB to all Ophir USB-speaking instruments (Centauri, StarBright, StarLite, Vega and Nova II meters, as well as Juno, Juno+, EA-1, Pulsar and the Bluetooth-enabled Quasar PC interfaces). In addition to all basic measurement and data logging functions, it also offers a wide range of special functions (including user-defined mathematical functions), multi-channel operation, COM Object for integration with external systems, etc. More information, and software download, is available at https://www.ophiropt.com/en/laser-measurement-instruments/laser-power-energy-meters/software/starlab.
For customers using the new LabVIEW COM Demo, there is nothing additional to do. Just open it and get started. If writing your own LabVIEW application, make sure that the OphirLMMeasurement COM Object is included in your LabVIEW application.
For customers using the legacy OphInstr LabVIEW package, here are additional clarification steps to assist establishing the interface to LabVIEW when connecting an Ophir meter such as the Juno/USBI/Nova II/Vega with the USB.
The sequence for preparing to interface the Ophir Juno (or meters connected through USB) with LabVIEW is generally as follows:
Disconnect any Juno OPHIR Device from the PC
Run SwapINF utility
Set LabVIEW option On
Press "Swap" button - You will be prompted to "Remove the Ophir Juno Devices before continuing"
Press "OK" (you have already removed these)
Press "OK" again (after SwapINF is done)
Reconnect the Ophir Juno device to the PC that you wish to apply LabVIEW VI's on If asked by Wizard (i.e. in XP) to update software etc.
Sometimes an application requires logging power from multiple power sensors, and being able to compare readings from the different sensors. In such cases, it is necessary to know to what degree the time points of each “channel” are in synch with each other.
Possible solutions would be to use a 2-channel Pulsar, or for example 2 Juno/Juno+.
With Ophir power sensors, the logged data timestamps originate from the PC, with millisecond resolution, for both Pulsar’s and Juno/Juno+.
So basically there is no difference between a Pulsar and a Juno/Juno+ in that respect. They will perform the same.
Each measurement will have its own separate timestamp, and will not have the exact same zero point. However, they will be ‘synced’ to each other to within a millisecond or so. Keep in mind that with power measurements, the instrument’s A/D sampling rate of the power signal is 15 Hz (i.e. every 66.67 msec), so for all practical purposes the 2 channels can be considered in synch with each other.
Accessories
Pulsar USB cable
USB-A to B cable (1 unit supplied with Pulsar).
Compare
Description
Compatibility
Drawings, CAD & Specs
Avail.
Price
7E01202USB Cable, USB-A to USB-B, Pulsar Power Meter
UNIVERSAL
In Stock
$51.00
Showing 1 to 1 of 1 entries
N Polarity Power Supply/Charger
Power Supply/Charger for Centauri, Vega, Nova II, LaserStar, Nova, EA-1, Pulsar, Quasar, 6K-W, 120K-W, 150K-W and fan cooled sensors.
Customers that purchase the above items also consider the following items. Ophir-Spiricon meters and sensors include a standard manufacturers warranty for one year. Add a one year Extended Warranty to your meter or sensor, which includes one recalibration.
In order to provide better service and products, please provide the following brief information. Any future resource requests will be automatically available.
Password Reset
Enter your email address below to reset your account password.
Password Reset
Email Verification Required
Cart Items Updated
Remove Product
Remove this product from your comparison list?
Check Order Status
Provide an order number and postal code to check the status of an order or download an invoice for an order that has shipped. Login to view your complete order history.
Sign In Required
To access this and other valuable technical resources, please sign in or register for a new online account.